Change Project Name
Introduction:
This documentation outlines the steps to rename a project within a Visual Studio solution. Please follow the provided instructions carefully to ensure a successful project renaming process.
Steps:
- Open Project Solution:
- Open your project solution by accessing the corresponding SLN file with the repository folder.
- Locate Files:
- When inside the solution of
Visual studio`, identify the following two files within your solution directory: - The top file is the Solution name (e.g.,
YourProjectName.sln, currently displayed as “Solution “name” (1 of 1 Project)”). - The bottom file is the Project name (e.g.,
YourProjectName.vcxproj).
As an Example Path:
-> Solution Name -> Project Name -> Files

- When inside the solution of
- File Name Adjustment:
- Change the name of the bottom file (Project name) to match the name of the top file (Solution name).
- Ensure both files have the same name.
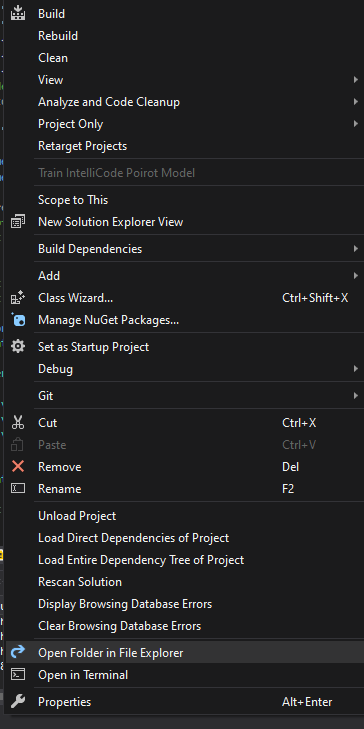
- Avoid Closing the Application:
- It is crucial not to close the application during this process to prevent any potential issues.
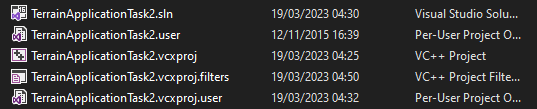
- Explore Project Location:
- Open your project location folder and observe the files.
- Note that only the
.slnfile is likely to be changed at this point.
- Modify SLN File with Notepad:
- Open the
.slnfile using Notepad. - Locate and update the names in the designated areas to your desired values.
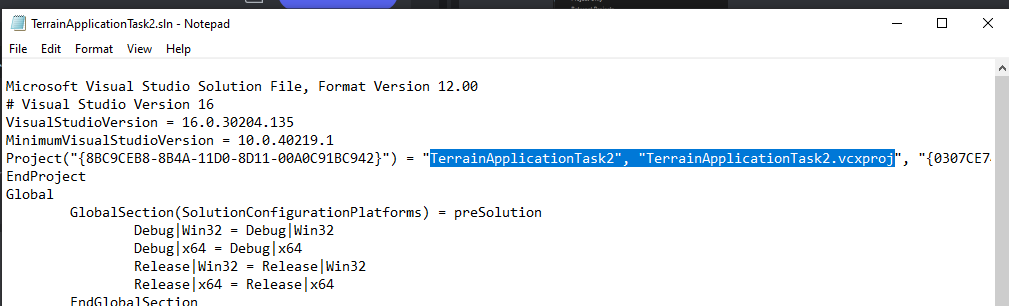
- Open the
- Edit vcxproj File:
- Open the
.vcxprojfile with Notepad. - Locate the section containing the project name and ensure it matches the new name.
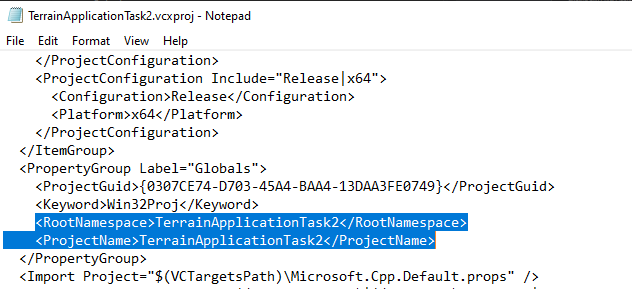
- Open the
- Re-Scan Solution:
- Open your
.slnfile and reload the solution to apply the changes.
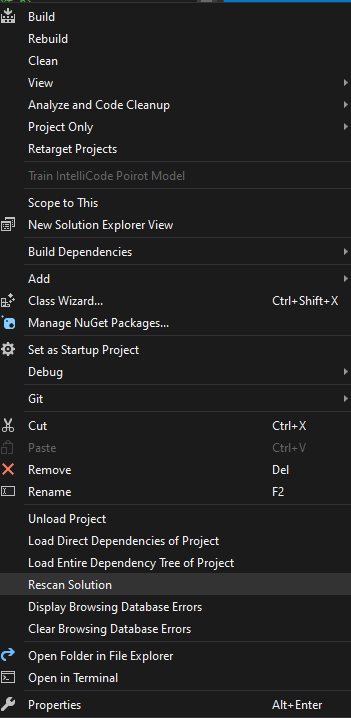
- Open your
- Adjust Filters:
- After reloading, default
filters, may be removed. - Create new filters named “Header Files,” “Resource Files,” and “Source Files.”
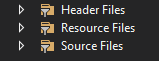
- After reloading, default
- Organize Elements:
- Transfer each project element into the appropriate filter.
- Add each filter along with its corresponding file.
- Temporary File Creation:
- If necessary, create a temporary text file to facilitate the addition of filters.
- Update vcxproj.filters:
- Open the newly created file and copy its contents into
vcxproj.filters. - Save the changes.
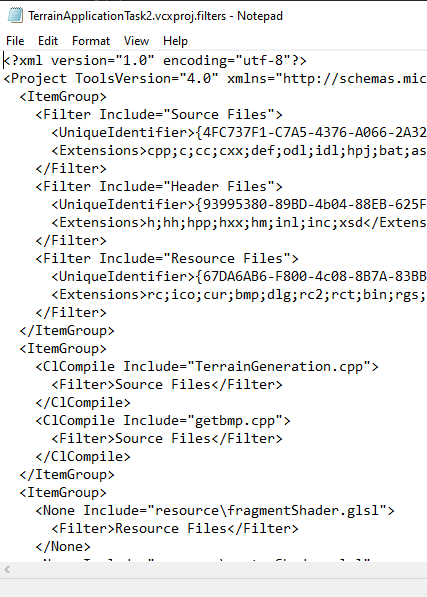
- Open the newly created file and copy its contents into
- Delete Unneeded Files:
- Delete the unnecessary
.filterfile. - Repeat the same step for the .user file, copying its data into vcxproj.user.
- Delete the unnecessary
- Review Changes:
- Verify changes in file statuses (red for removed, green for added, yellow for changed).
- Close and Re-Open Solution:
- Close the solution and reopen it to ensure that everything functions as expected.
- Test Functionality:
- Verify that the project works correctly.
- If any issues arise, repeat steps from 5 onwards until the process is completed accurately.
By following these steps, you should have successfully renamed your project within the Visual Studio solution, and the solution name should be displayed as “Solution name (1 of 1 Project).”